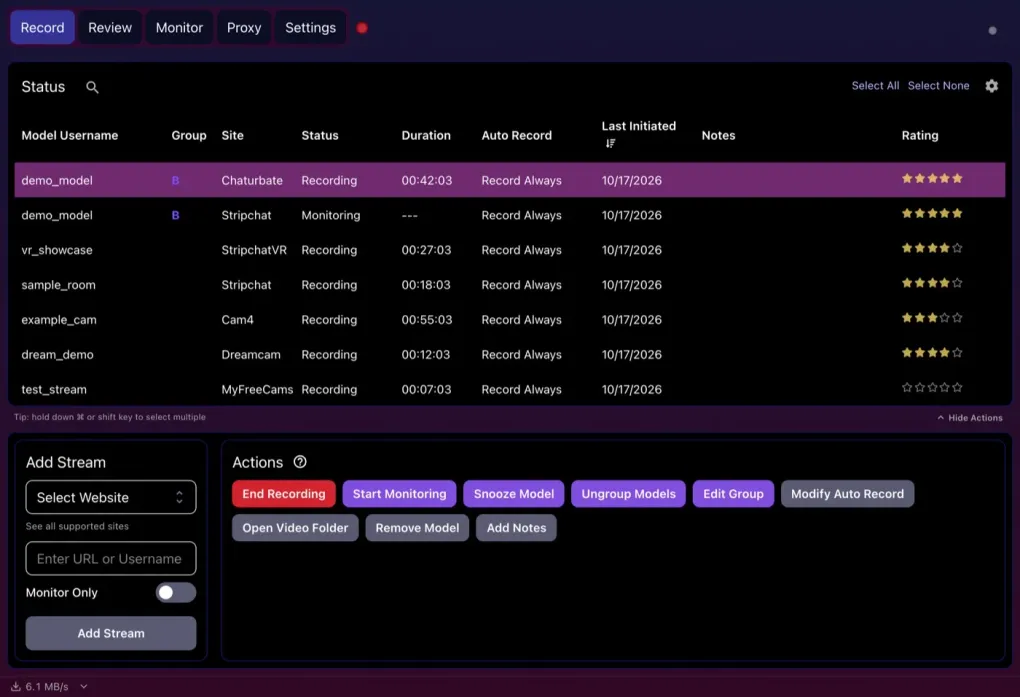
CaptureGem vs CTBRec for Recording Rigs and Always-On Servers
Table of Contents
- Verdict up front
- Spec sheet for rig builders
- The capture path: why neither needs a big GPU
- Post-processing load
- Disk planning
- Bandwidth planning
- Always-on machines: server mode vs headless recorder
- CTBRec’s server package
- CaptureGem’s two routes
- Test it on your own hardware
- Which fits your rig?
- Bottom line
When you spec a machine to record cam shows around the clock, the recorder you choose shapes the build more than the CPU model does. CaptureGem and CTBRec are both stream recorders. Neither films a browser window, and neither has to encode video live while it records. So the differences that matter for a rig are where the recorder runs, how much work lands on the machine after each recording, how files reach your disks, and which operating systems you can build on.
Verdict up front
CaptureGem is the better foundation for most recording rigs. One desktop app covers Windows, macOS and Linux, it handles more sites (VR included) in one process, it has storage safeguards built in, and its library doesn’t depend on a post-processing chain you maintain. CTBRec’s edge is architectural: a dedicated server package that its desktop GUI controls remotely, and it’s free and open source. If you need a headless box you manage from a GUI on another computer, CTBRec does that more conveniently. CaptureGem’s headless route is its recorder daemon on Linux, driven through a local HTTP API and aimed at advanced users.
Spec sheet for rig builders
| CaptureGem | CTBRec | |
|---|---|---|
| Capture method | Saves the site’s source stream | Saves the site’s stream as .ts |
| Encoding during capture | None in the normal path | None; transcoding is an optional post-processing step |
| Finished files | MP4 (default) or MKV | .ts, with remux or transcode via post-processing |
| Work after each recording | Converts temporary segments into the finished file and builds preview grids | Whatever you configure: copy, move, rename, remux, transcode, scripts, contact sheets |
| Platforms | Windows, macOS, Linux desktop app | Windows, macOS and Linux builds with a bundled Java runtime (and a no-JRE Windows build) |
| Unattended or server use | Desktop app with Premium auto-record; advanced headless recorder on Linux with a local HTTP API | Separate server package, driven by the desktop GUI through the “Remote” location |
| Sites in one recorder | 24 built in, three of them VR, plus 130+ platforms via Streamlink | 11 listed on its website |
| Storage tools | Separate temp folder, minimum free disk space, disk audit, segment length cap | Post-processing steps to delete too-short recordings and move finished files |
| Cost | Free version; Premium for unattended use | Free, open source, donation-supported |
The capture path: why neither needs a big GPU
On the sites both apps support, they download the stream the way the site delivers it. There’s no decode, render and encode loop of the kind a screen recorder runs, so the GPU’s video encoder stays idle and the CPU has little to do while recordings are in progress. On either app, the limits you hit first are download bandwidth, disk write capacity, free space and whatever processing runs after a stream ends. Our pieces on which resources stream capture actually uses and whether you need a GPU at all go deeper.
Where the two really diverge is after the recording stops.
Post-processing load
CTBRec writes .ts files directly, so a recording can be played as soon as it stops, in any player that handles transport streams. What happens next is your call. A remux to MP4 or MKV is a light job, mostly disk reads and writes. A transcode with your own FFmpeg arguments is a full re-encode, and on a busy rig that’s where CPU time disappears, so schedule it or skip it. Contact sheets also run FFmpeg over every file. On the server package, this whole chain lives in server.json, edited by hand, since server post-processing has no UI.
CaptureGem records into temporary segments and converts them into the finished MP4 or MKV when a recording ends. That’s normally a stream copy rather than a re-encode, but it’s a real read-and-write pass over the data, and the occasional repair job can use CPU. It also generates the Review tab’s preview grids by itself. None of it requires a pipeline you have to write or maintain.
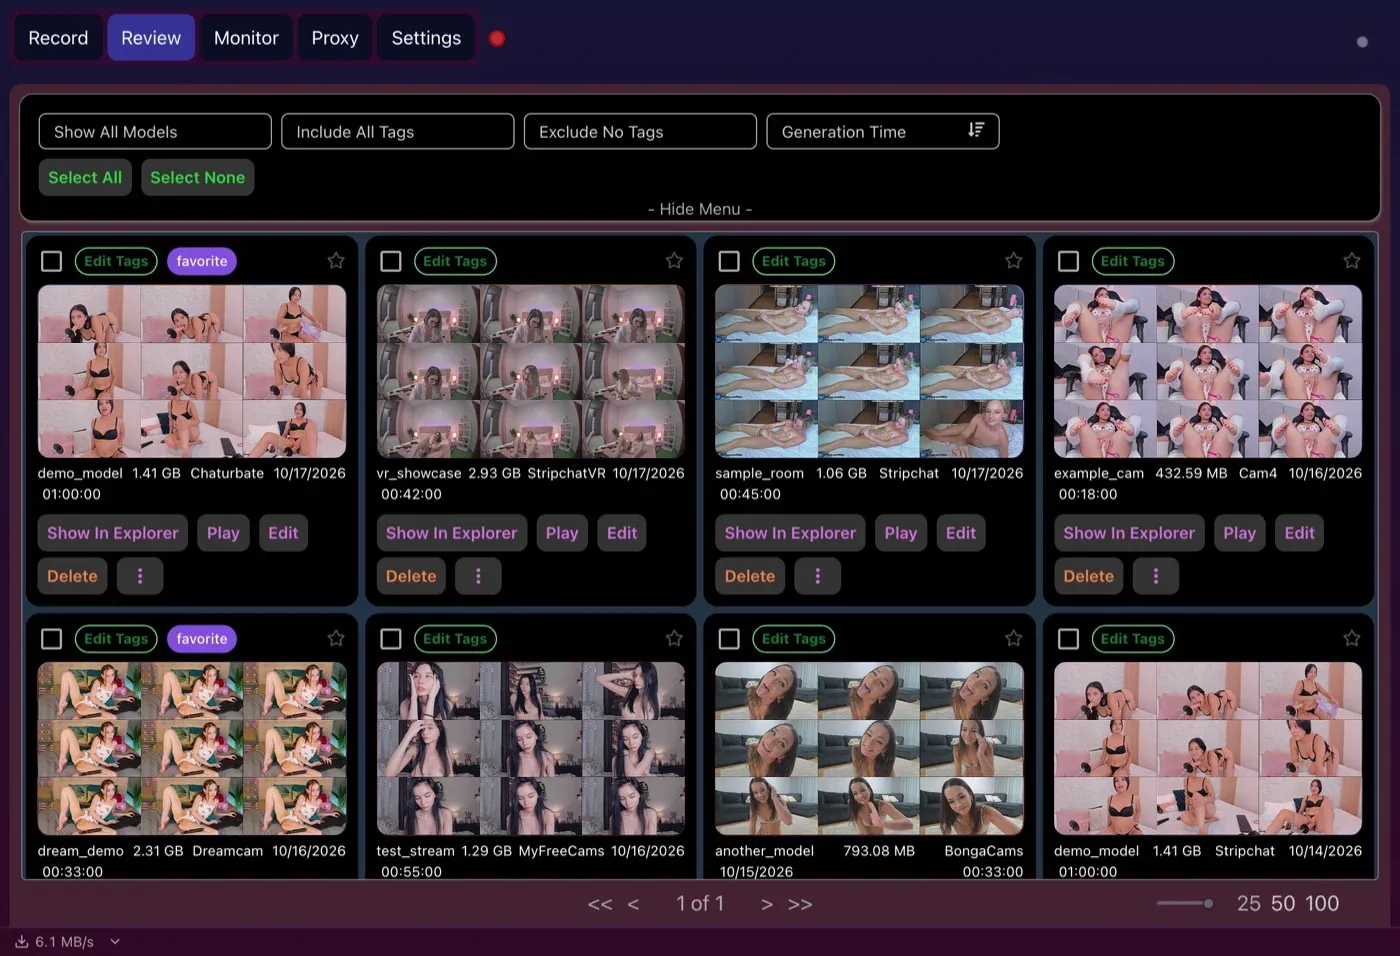
Preview grids appear on the Review tab without any setup. CTBRec’s equivalent is a contact-sheet step in its post-processing chain.
Rig tip: CaptureGem lets you place the temporary folder and the finished-video folder on different drives. Keep temp on a fast local SSD that handles many small writes, and send finished videos to bulk storage. Our guide to external and network storage covers the path checks to make first.
Disk planning
Both apps write at the source bitrate, so plan capacity from what your models actually stream and how many hours you record, not from an encoder setting. The Recording & Storage Calculator is a good starting point.
CaptureGem adds a few guard rails that matter on an unattended machine:
- Minimum Free Disk Space for Recording (%) cancels recordings once free space falls below your threshold, instead of letting the drive fill to zero.
- Audit disk space shows how much room recording temp files, retained temp files and temporary previews are taking.
- Cap Video Segments at Duration splits long sessions into segments, 60 minutes by default, which keeps individual files manageable for copying and backups.
- On the Review tab, deletion protection and batch delete make pruning a full drive less risky.
CTBRec’s tools here are its post-processing steps: delete recordings below a minimum length, and move finished files to another location.
Bandwidth planning
In either app, each active recording is one download. Add up the bitrates and leave headroom; our bandwidth and storage limits guide shows the arithmetic. CaptureGem shows the total download speed in the corner of its window, and its Max Concurrent Auto Recordings setting caps how many automatic recordings can run at once, so a busy evening can’t oversubscribe your line.
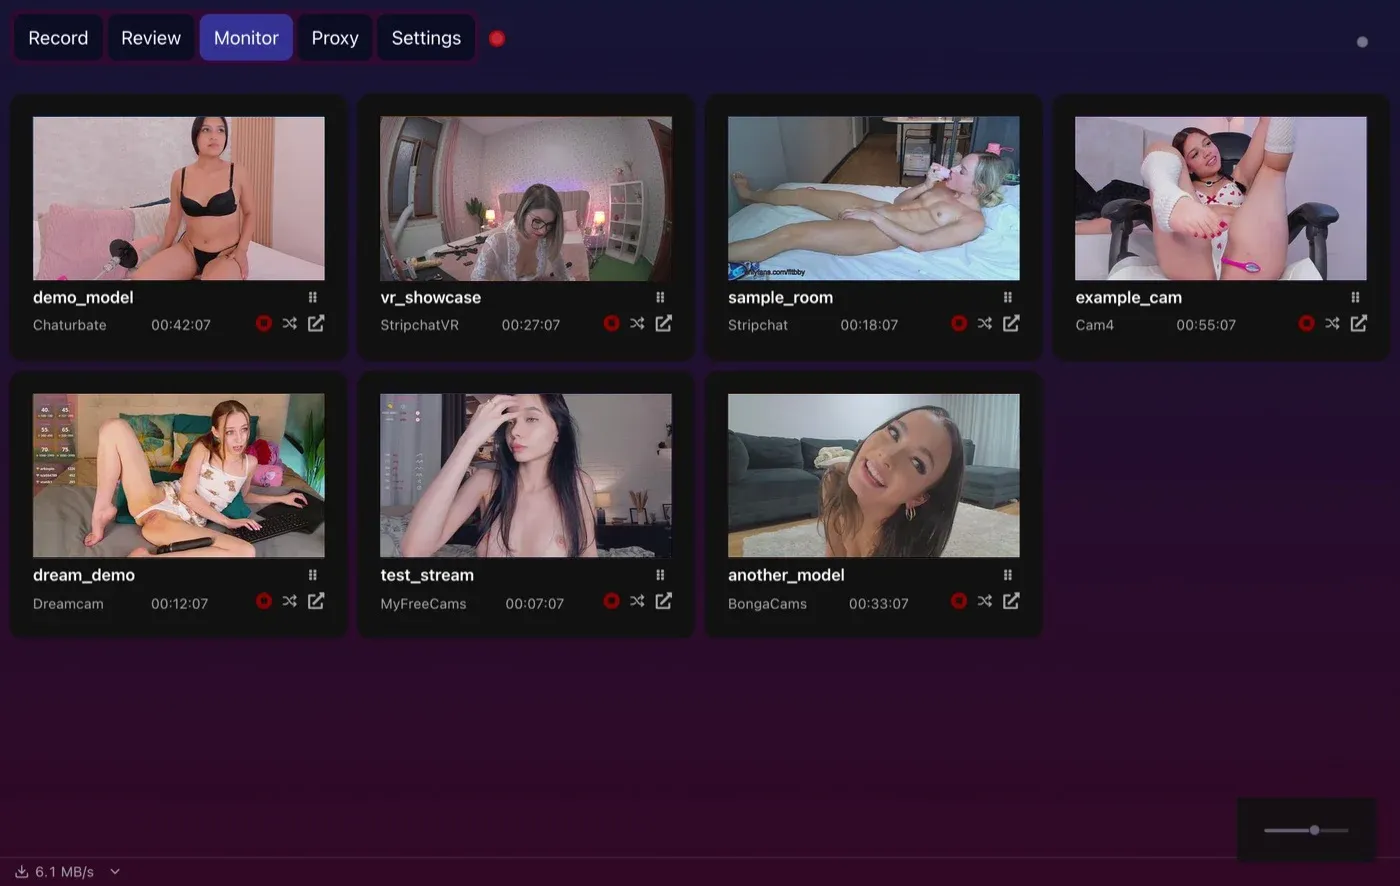
Live tiles for all active recordings. CaptureGem doesn’t pull a second stream for these previews, so checking on the rig costs no extra bandwidth.
Always-on machines: server mode vs headless recorder
CTBRec’s server package
This is CTBRec’s best feature. You install the server package on a home server or VM, point the desktop app’s recording location to “Remote”, and manage recordings from your everyday computer. It’s free, and it suits people who already run a box in a closet. The tradeoff is configuration by file: the connection and any server-side post-processing go into server.json.
CaptureGem’s two routes
A dedicated desktop machine. The simplest always-on CaptureGem rig is the full app running in a logged-in session on a mini PC, spare laptop or small desktop, with Premium auto-record set to Record Always. It starts when a model goes live and restarts after disconnects or network timeouts. Because the app is identical on all three systems, the box can run whichever OS you maintain best. Work through our first-run checklist for a dedicated recording computer, and on Windows see keeping the machine ready for background recording.
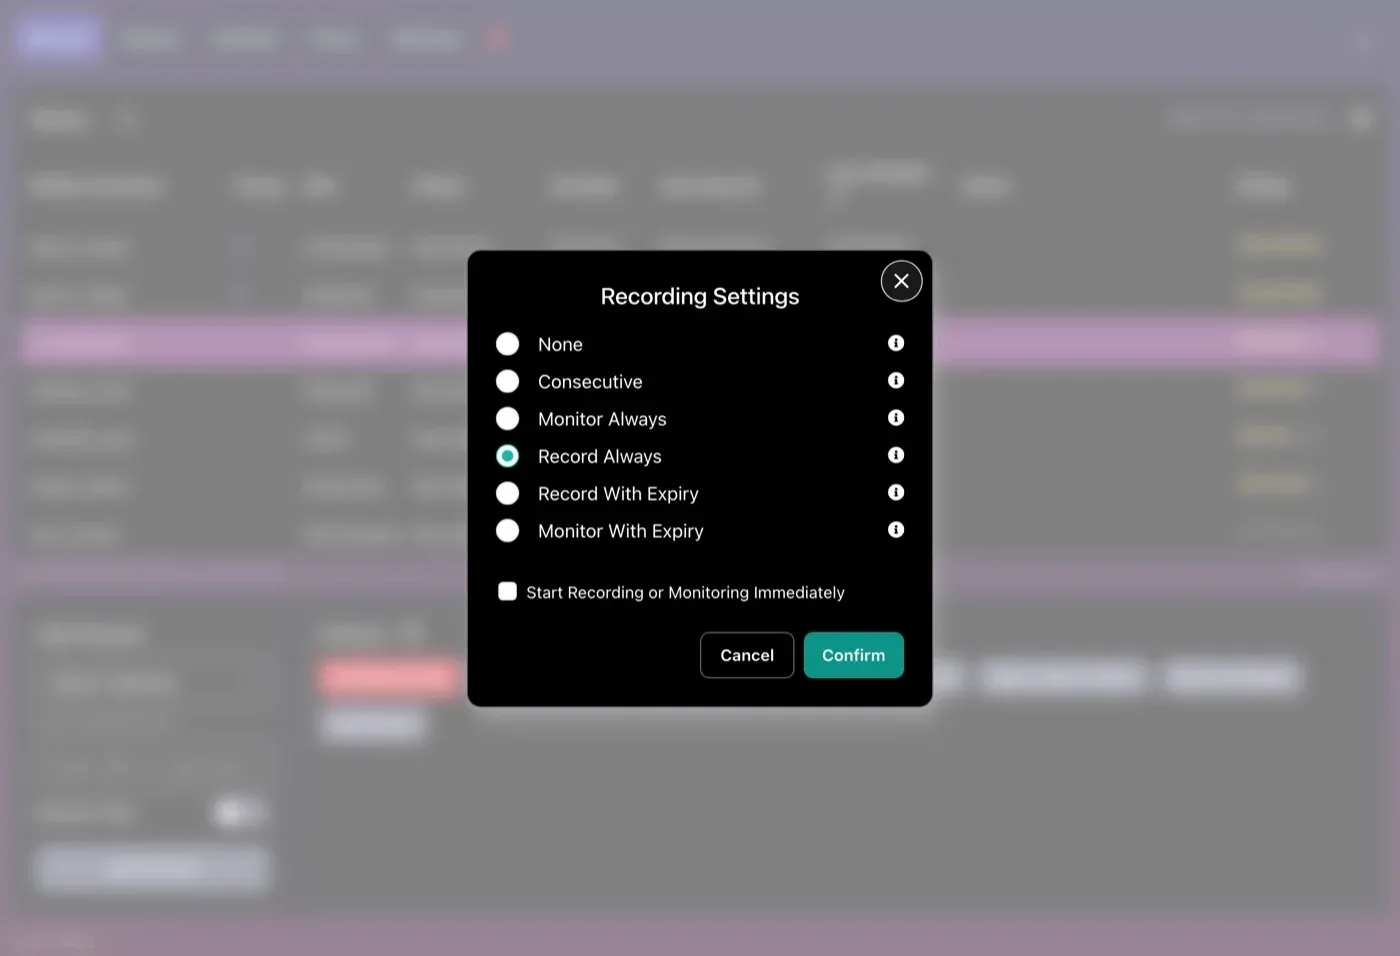
Record Always is the mode an unattended rig runs on (Premium).
The headless recorder on Linux. CaptureGem’s recording engine, recorderd, can also run as a standalone daemon with no desktop app, accepting commands over a local HTTP API. This is for advanced users. The standalone Linux guide covers the setup, and our Linux setup notes summarize it. Two cautions. There’s no remote GUI, and six sites need the full desktop app: LiveJasmin, XCams, ManyVids and Superlive record through the desktop app, and CamSoda and AmateurTV use its built-in browser for status checks. And the API doesn’t authenticate requests, so keep its port off untrusted networks and reach it through an SSH tunnel or VPN, as described in remote management and hardening a Linux recording machine.
Test it on your own hardware
Published stream counts mean little, because sites, bitrates, network paths and drives differ. Use the benchmarking method: start with one stream, add a few at a time, and watch throughput, CPU, free space and temp-folder growth. Let each test finish and play every file. When comparing the two apps, include the post-processing: time a CTBRec transcode if your chain has one, and watch how quickly CaptureGem clears its conversion queue after a long session.
Which fits your rig?
Build around CTBRec if you already run a home server, want to drive it from a GUI elsewhere, need zero software cost or open source, and don’t mind maintaining server.json.
Build around CaptureGem if you want one recorder for every site you follow, VR included; MP4 files without a remux stage; storage safeguards and a library on the same machine; and the freedom to build on Windows, macOS or Linux.
Bottom line
CTBRec’s server mode is a genuine strength for headless setups, and it’s free. For the machine most people actually build, a quiet always-on computer that records everything and stays out of the way, CaptureGem asks less of you, needs no post-processing chain to maintain, and covers more sites while doing it. That makes it our pick. Download CaptureGem to test it on your rig, then choose a Premium plan for unattended recording.
Record responsibly: capture only streams you’re permitted to save, and show respect for performers, site terms and the laws where you live.
Loading comments...